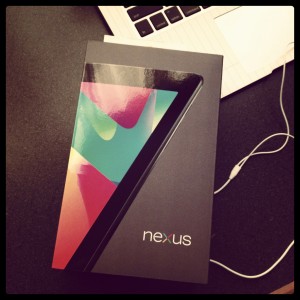
Google’s Nexus 7 feature a stunning display which places us right inside the action with perfect experience when reading, browsing, and playing. By this time, you might have received your Nexus 7 tablet from Google. One of the common think we will do is transfer music, video files, pictures from the PC computer to Google tablet. Here are the steps for transferring files from the PC to your Nexus 7. (If you are Nexus 10 user, turn to media transferring steps here)

You can use a USB cable to transfer videos, music, pictures, and other files from your tablet to a computer and vice versa. This connection uses the MTP protocol, which is supported by most recent versions of Windows but not by Mac OS X. For file transfer to Mac OS X, you use the free Android File Transfer application.
Method 1: Transfer files through USB
Windows transfer
1. Using USB cable connect the Nexus 7 phone to your PC computer.
2. As soon as you connect both of them, you will see the PC computer start installing the required drivers.
3. Once the driver installations are over, the Nexus 7 tablet is mounted as a storage device.
4. Now you can copy the music, video and pictures files from PC to Nexus 7.
Google Nexus 7 file format are listed below
Supported Music file formats: AAC, FLAC, MP3, MIDI, PCM/WAVE, Vorbis, AMR-WB, AMR-NB
Supported Video file formats: H.263, H.264 AVC, MPEG-4, VP8
Supported image formats: JPEG, GIF, PNG, BMP, WEBP
Related settings: To change your tablet’s USB connection options, touch Settings > Device > Storage > Menu > USB computer connection.
Mac OS transfer
1. Install Android File Transfer from www.android.com/filetransfer, and follow the instructions there. (If you are using Android File Transfer for the first time, double-click it to open it. After the first connection, it opens automatically whenever you connect.)
2. Connect your tablet to your computer with a USB cable. Android File Transfer starts, if it’s not already running, and opens a window that displays the contents of your tablet, along with storage space details at the bottom of the window.
3. Work with this window much as you do in the Finder window: open and close folders, create new folders, and drag files to or from it and other Finder windows.
4. Disconnect the USB cable when you finish.
Method 2: DoubleTwist—USB Wired Transfer (PC and Mac)
DoubleTwist is a popular and lightweight software for you to manage and sync your iTunes music, photos and videos. It’s easy to use and completely free. Also supports wireless sync with the Air Sync client ($4. 99 on Google Play). Visit doubletwist.com for additional details.
1. Download doubleTwist from Google Play on your Google tablet.
2. On your computer (PC or Mac), use your browser to go to doubletwist.com, and use the link to download DoubleTwist. Follow the installation instructions.
3. Follow the instructions on the app on your device and the computer to set up synchronization between DoubleTwist on your computer and Google Nexus 7.
4. NOTE: If DoubleTwist has trouble recognizing your Google tablet when it is attached to your computer’s USB port, follow the instructions below to connect your Nexus 7 as a storage drive. Once complete, try the synchronization process again.
a. Attach your Google tablet to your computer (PC or Mac) using the USB cable. If this is the first time you’ve connected your device to your computer it will install the necessary drivers on your computer.
b. On your Nexus 7, touch Applications Settings > Wireless and network > USB utilities.
c. Remove the USB cable from your Google tablet.
d. On your Google tablet touch “Connect storage to PC”. You will see a warning: “USB utilities / Connect USB cable to use mass storage.” Insert the USB cable into your Nexus 7 while the message is still on the screen. Do not touch “Cancel”.
e. The screen will change to “USB mass storage” with a picture of a green Android and a message that says “USB connected.” Touch “Connect USB storage” at the bottom.
Tips to Get Your Files Fit for Google Nexus 7 Playback
1. Better Put Google Nexus 7 friendly videos to the device.
2. With a powerful third-party media player you can play more videos. For your reference about the best Android Video player, you can check out a guide here.
3. Don’t put copy-protected contents onto the Google tablet. Movies purchased from online video stores (e.g. iTunes, Amazon) or Digital Copies from Blu-ray/DVD discs are restricted with DRM. To have the Google or Nexus 7 to play these files, get yourself a DRM removal tool first.
- ByteCopy($42) + Vidpie($29) = Only $54.9, Save $16.1
- Video Converter Ultimate($65) + Vidpie($29) = Only $74.9, Save $19.1
4. Compress/convert your HD videos to Nexus 7 when necessary.
5. The best settings for converting videos to Nexus 7 depends.
More video tips: